I love the idea of using the Raspberry Pi Zero as a headless home automation IoT appliance. Actually, using multiple Zero(s) to run independent NodeJS services sounds very appealing. I’ve been wanting to do something like this for years. The main thing that kept me from my plan to have my house running completely on the Raspberry Pi platform was my inability to easily and effectively setup a Pi for NodeJS; particularly, the Pi Zero due to its no on-board network interface. I wanted to be able to start with a blank microSDHC and end up with an SSH enabled device connected to the network and running NodeJS without needing a keyboard and monitor during the process. Here’s what I do to get my headless Zero(s) up and running in a very short amount of time.
Please refer to the following component descriptions during this tutorial:
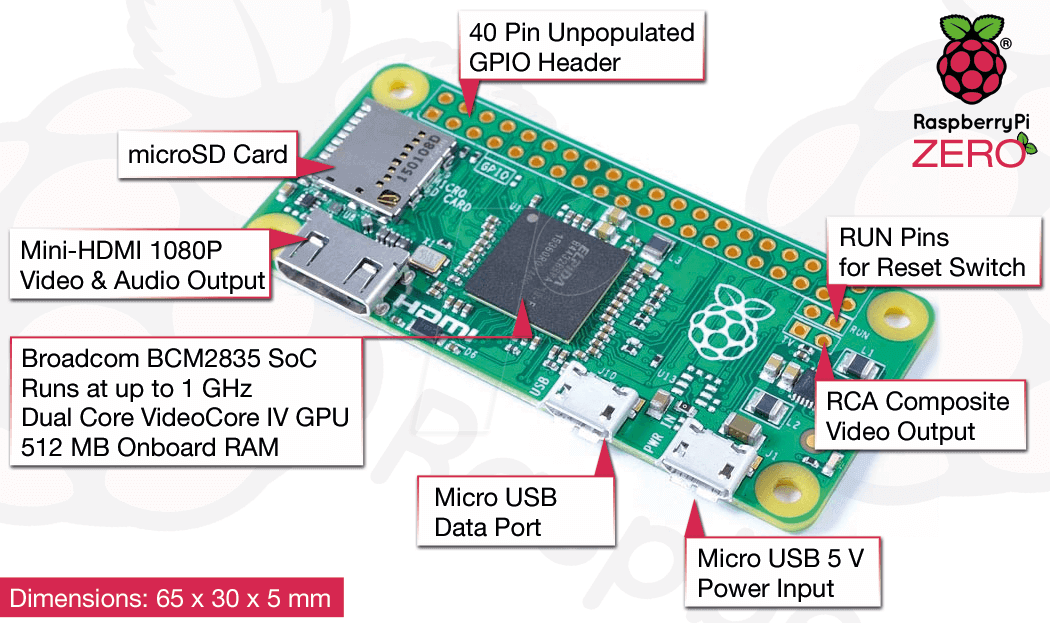
Image courtesy cdn-reichelt.de and may be subject copyright
Equipment You’ll Need
- Your Windows 8 PC with SD interface or adapter
- Pi Zero $5 buy
- Blank 8GB microSDHC w/Adapter $7.50 buy
- Micro USB OTG Ethernet with 3 Port Hub $16.00 buy I like this unit because it is supplied with a USB power-only cord and can be externally powered as well as USB powered. This also supplies power to our Pi Zero; which is a plus.
- 5V 2A USB Power Supply $6.95 or equivalent buy
- (Optional) Adafruit Pi Protector buy
If you want to purchase a microSDHC card with Jessie Lite already on it, get it here and skip straight to section Boot the Pi Zero and Connect with PuTTY.
Updated 2016-10-03: I added a very short tutorial for using a Wifi dongle instead of the USB Ethernet adapter like the one above. If you want go wireless instead of using wired Ethernet, see the wifi post. The wifi tutorial shows only the steps needed to configure the wifi. You will still need to follow all the steps in this tutorial. I’ll make a note below as to when it’s appropriate to jump to the wifi tutorial.
Given that a Pi 3 is $40+ with power adapters, etc., it’s a good way to go when you don’t need a quad-core and 1G RAM.
Software You’ll Need
- Raspbian Jessie Lite download Extract the .img file
- SDFormatter download
- Win32 Disk Imager download
- PuTTY download
What We’re Going To Do
- Install Raspbian Jessie Lite on 8GB microSDHC Card
- Boot the Pi Zero and Connect with PuTTY
- Install Git and NodeJS
Install Raspbian Jessie Lite on 8GB microSDHC Card
Follow these simple steps to prepare your microSC Card:
Download Raspbian Jessie Lite image in zip file format. download
Extract the 2016-05-27-raspbian-jessie-lite.img file. The 2016-05-27 was the release at the time of this writing.
Format the SD card with SDFormatter.
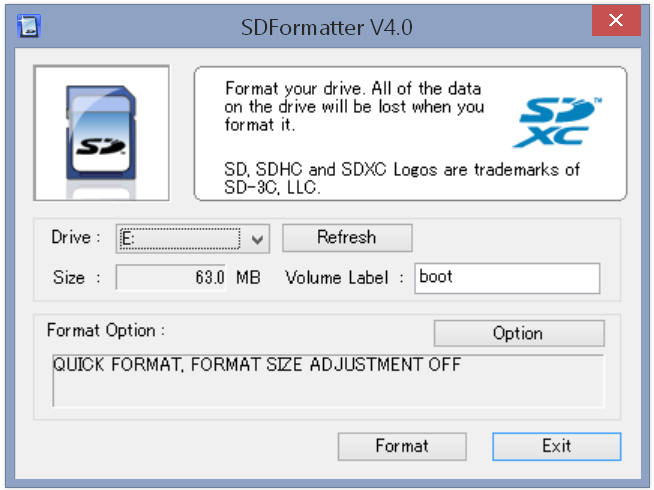
Be sure the select the FORMAT SIZE ADJUSTMENT: ON like this: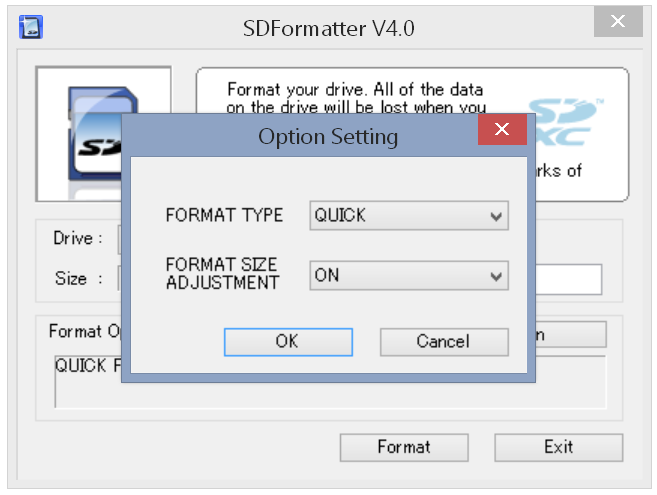
INSURE YOU HAVE SELECTED THE CORRECT DRIVE LETTERRun Win32 Disk Imager as administrator and write the 2016-05-27-raspbian-jessie-lite.img file to the SD Card.
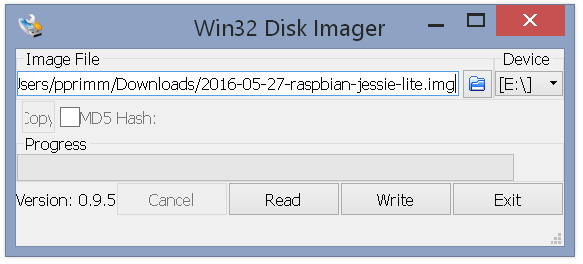
AGAIN, INSURE YOU HAVE SELECTED THE CORRECT DRIVE LETTER
Carl Recktenwald Jr. has a YouTube Video that shows using SDFormatter and Win32 Disk Imager. You can watch up to 2:30 where then begins a boot using monitor, keyboard and mouse. But, we’re going headless, so the remainder of that video doesn’t pertain to what we’re trying to accomplish.
Running with Wifi: If you want to use a wifi dongle instead of the Ethernet adapter, perform the steps in my wifi tutorial now. Then, come back and continue with the next section for booting the Pi Zero.
Boot the Pi Zero and Connect with PuTTY
Follow these steps to boot and connect to your Pi Zero over SSH:
Insert the newly ripped SD Card in your Pi Zero. The Card holder is just an interference fit socket; so, is doesn’t click or have the bounce-in/out function like some other Pi(s).
Connect the Micro USB Ethernet USB-HUB to the Zero’s Micro USB Data Port. Make sure you are connecting to the data port and not the power-only port. Refer to picture above. Use the Ethernet adapter’s power cord to power the adapter and Pi Zero. Jessie should automatically, by default, find the USB to Ethernet adapter, connect to the network and obtain an IP via DHCP.
After giving the Pi Zero a few minutes to perform the first boot, try to connect over SSH using PuTTY. The easiest method, if it works, is to rely on the Bonjour Service which should be enabled on Windows 8 or exist because you are using an Apple piece of software that relies on Bonjour. Try connecting over SSH using pi@raspberrypi.local on port 22.
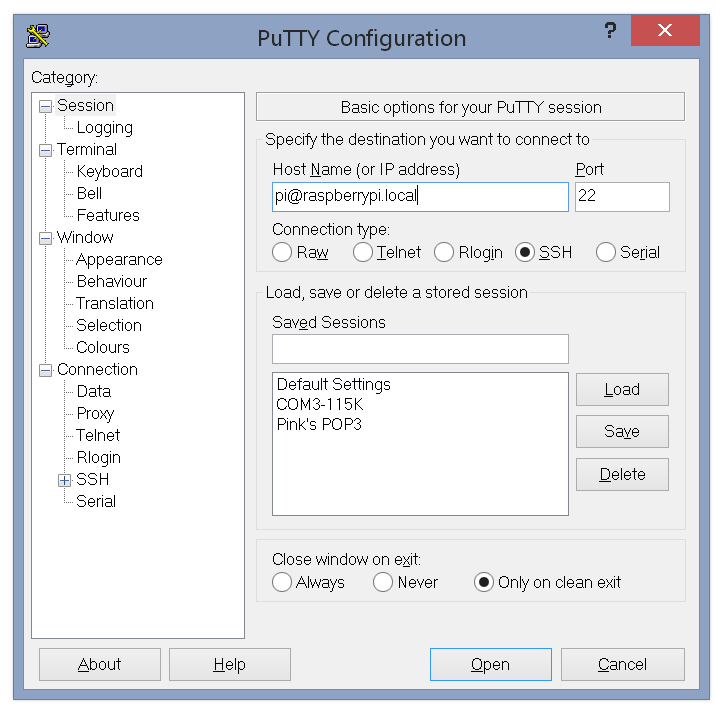
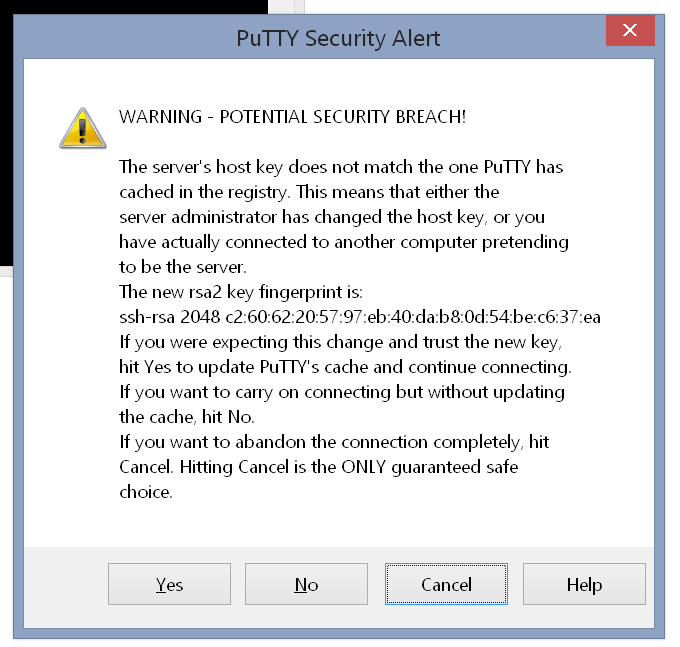
If connecting using the local domain works and PuTTY is connecting to the Pi Zero host for the first time, then you will see something like this:
If you don’t see the above warning or PuTTY gives you an error message that it can’t open the connection, go to the [Finding Your Pi Zero’s IP] section below. This section provides several methods for finding the IP of your PI Zero.
However, if you see this window, select [Yes] to continue and you will be presented with the login prompt. The default password is [raspberry] (without the [ ]).

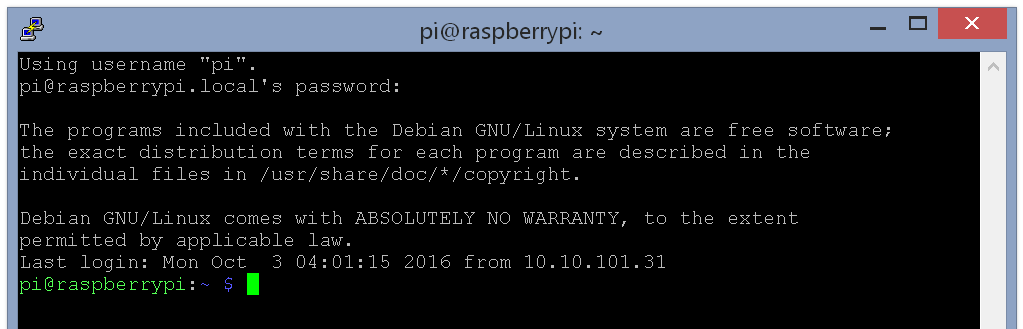
Once you login, you should see something like this:
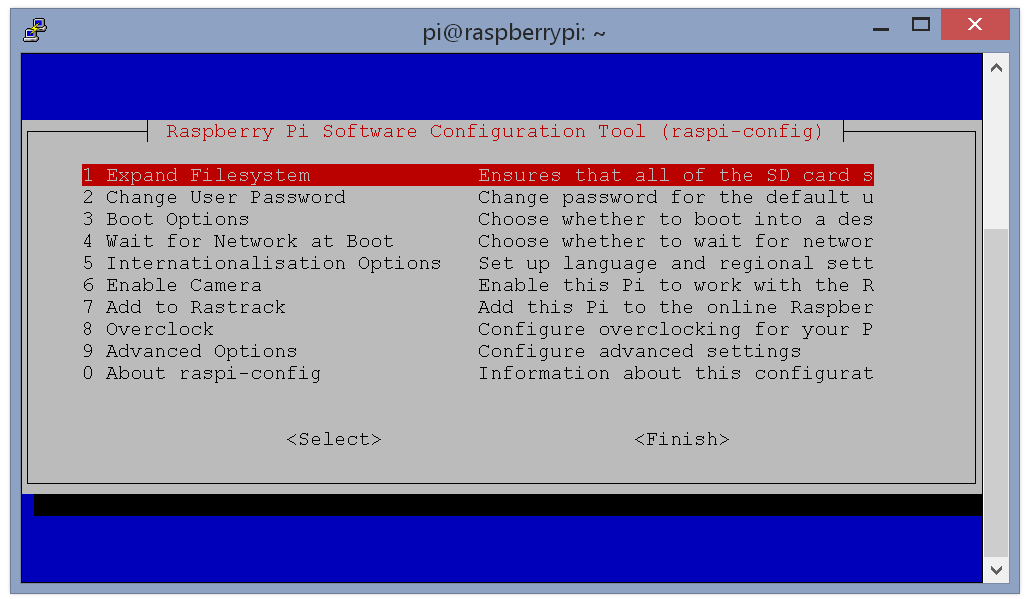
Open the Configuration Tool and make any changes you would like. You do this by entering the following command in PuTTY terminal:
1$ sudo raspi-configUpdated 2016-10-03: A RasPi user notified me that starting with Jessie 2016-05-10, a script will auto-expand the file system on first boot. You don’t need to perform this step. But, if you are interested in bringing up the Configuration Tool and looking around, you can go ahead and continue as a learning exercise; otherwise, jump down to step 5.
Executing this command show you the configuration tool. The only configuration item we’re going to do now is expand the file system. Select the fist item [1. Expand Filesystem] and select [Enter]. The filesystem will be expanded to used the full size of the SD Card.
Now, just scroll down and select [Finish]. If you are asked to reboot, say Yes. You will be logged off and PuTTY will disconnect. Give the Pi Zero time to reboot. Then, reconnect with PuTTY and continue to the next step.
Perform Jessie updates by entering the following two (2) commands in the terminal; allowing a command to complete before continuing to the next.
12$ sudo apt-get update$ sudo apt-get upgrade
Install Git and NodeJS
Now we’re going to install Git and NodeJs. Perform these steps:
Install Git using the following command:
1$ sudo apt-get install gitInstall NodeJS using the following commands; allowing each to complete:
12345$ wget https://nodejs.org/dist/v4.5.0/node-v4.5.0-linux-armv6l.tar.gz$ tar -xvf node-v4.5.0-linux-armv6l.tar.gz$ cd node-v4.5.0-linux-armv6l$ sudo cp -R * /usr/local/$ sudo reboot- After reboot, re-login and execute the following command to verify the NodeJS install.
12$ node --versionv4.5.0
Now we have a Raspberry Pi Zero connected to our network and running NodeJS; ready to clone a repository and get to work. I hope this is useful for you.
Finding Your Pi Zero’s IP (if raspberrypi.local doesn’t work)
We need to perform this step only if PuTTY can’t connect using [pi@raspberrypi.local]. In that case, there are several methods we can use to find the IP of our Pi Zero. Try one of these methods:
One of the easiest methods is to login to your router and look at the list of connected hosts. This might give a clue as to the new IP; especially if the raspberrypi name is listed or your other hosts are listed by name. If it’s not clear what the IP is, then try another method.
If you have an IP scanner, use it. Chances are, if you have an IP scanner, you know how to use it and you are used to finding IPs of unknown hosts using this method. We’re looking for an open port 22. So, if your scanner supports particular port scans, this will focus the scan and likely give better results.
Use an nmap scan download. Go to the nmap download page and scroll down to Microsoft Windows binaries and locate [nmap-7.30-setup.exe]. Download and install. This is the Zenmap GUI for Windows. Run the program and enter [nmap -p 22 10.10.101.0/24] in the command field as shown here (replacing my LAN IP, 10.10.101.0 in this case, with yours).

The Target field will be filled in automatically. Select Scan and review the results in the [Nmap Output] tab. You are looking for an open port 22 like this:

Yay! We found the Pi Zero at IP 10.10.101.43. Write down your IP for future reference. Then, go back to the boot section, item 3 and continue with the setup.